|
|
|
|
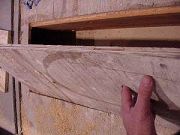
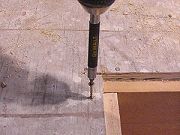
Step 5: Using the hole you drilled earlier, pull the damaged section out. If the circular saw didn't get all the way into the corners, use a handsaw or an angle grinder with a wood cutting blade. When you have the section out, inspect the floor joists. If they appear to be rotten or damaged in any way, stop and call a professional. |
|
|
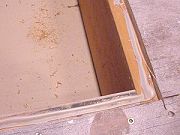
Step 6: (This step is optional but recommended, especially if you are going to install tile.) Using an appropriate material (2x4's are ok but use 2x6's if you can) frame a small box that will fit into the hole. This will support the two sides of the patch that do not land on the joists. Run a bead of construction adhesive on the floor joists and screw the support frame in between the joists. |
|
|
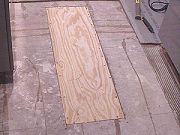
Step 7: Using the piece you cut out as a pattern, cut a replacement. This replacement should be of the same material that you removed. At least the same thickness material as you removed. Run a bead of construction adhesive around the perimeter. |
|
|
Step 8: The patch needs to be screwed in place. Do not just nail it down. |
|
|
|
|
|
|
|
|
|
Related articles
|
||||