|
|
|
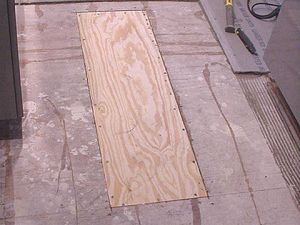
Fixing a damaged section of subflooring |
|
During the course of any project, you will run across unexpected obstacles. In preparation for a new floor (tile, wood or sheet), there may be a section of the subfloor which is too "bouncy" or soft. There are many variables that will contribute to this situation. Support , quality of the material, adequate thickness or history, but the fact is that this section will have to be replaced. |
 |
|
Items needed:
Circular Saw
Tape Measure Chalk Line Chisel Screws Electric Screwdriver Replacement subfloor material Construction adhesive |
Safety Suggestions and Tips
Set depth blade to avoid cutting joist
Use same thickness subflooring material Screw, do not nail patch Avoid hitting nails with chisel |
Level of difficulty
 Time Required: 4 hour
|
|
|
|
Steps |
|
|
|
|
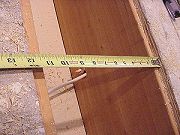
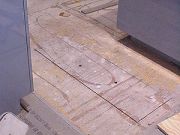
Step 1: In order to get over this hurdle successfully you will need to determine where the joists are and plan your cuts accurately. Popping a chalk line or using a straightedge and pencil, mark the area that you want to remove. Two sides should land on the centerline of the floor (joists floor joists are usually 12" apart). You can find the floor joists by locating the screws or nails that hold the subflooring down.. |
|
Step 2: Drill a hole through the middle of the area with a bit large enough to accommodate your measuring tape (usually 1"). Measure the thickness of the subfloor through the hole (most subfloors are 5/8" or 3/4" plywood). |
|
Step 3: Set the depth of cut (deck) on your circular saw to the same measurement you obtained above. This will ensure that you do not damage the floor joists while cutting the subfloor |
|
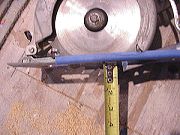
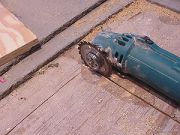
Step 4: Slide the blade guard out of the way. Start the saw and, while firmly holding the saw, ease the blade down into the subflooring. Avoiding nails and screws, cut until the middle of the blade reaches the end of the line. It may be necessary to go slightly past your marks to free the damaged section, remember that your blade is round not straight. In this case I used a hand held angle grinder with a wood cutting blade to finish the cuts. To clean the edges and corners of anything else, use a sharp 1/2" chisel. Repeat this for all four sides. |
|
|
|
|
|
|
|
Related articles
|
||||