|
|
|
|
|
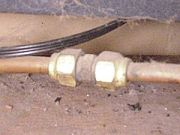
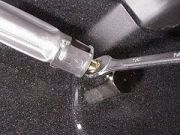
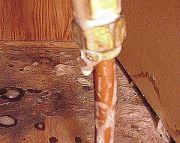
Step 5: Now carefully drag the unit on top of the plywood, avoiding damage to the gas line. Climb in back of the unit and disconnect the old gas line at the coupling, using two wrenches. Be careful not to crimp the cooper piping. |
|
|
Step 6: Skip to step 11 if you have natural gas |
|
|
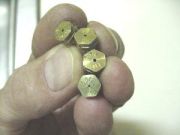
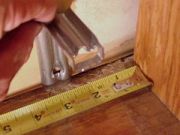
Step 7: These are individually sized with marks and colors. Using a nut driver, loosen the old spud and replace with the new one. The trick to keeping from dropping the spud down inside the range is to use a small piece of aluminum foil between the driver and the spud. This should provide enough "grip". If you do drop one down inside, you'll need torx wrenches to disassemble the burner units and get inside. The oven orifices need to be adjusted. |
|
|
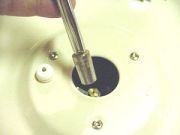
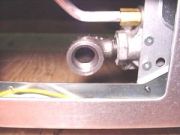
Step 8: Using an open-end wrench, tighten down the brass fitting. |
|
|
Step 9: There may be two orifices, one for the broiler and one for the main oven. |
|
|
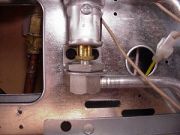
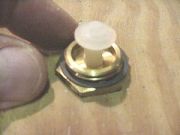
Step 10: Underneath the unit, you will need to reverse the plastic pin in the regulator. Remove the hex nut and flip the plastic pin and reassemble the nut. Do not over tighten this. The last step is to open the air shutters as per directions. |
|
|
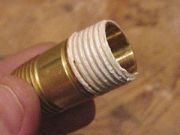
Step 11: To connect the gas line, you will need to purchase a new connector line. Bring the old connector to the store as you will have to match up pipe thread at the stove with the compression fittings on the old gas line. |
|
|
Step 12: To make the connection, coat the threads with pipe compound. |
|
|
Step 13: Tighten the fitting and test by applying very soapy water. (No matches please!) If it bubbles in a few seconds, you have a leak. Try again! |
|
|
Step 14: The anti-tip bracket is mounted to the wall behind the stove. Simply screw this in as per directions. |
|
|
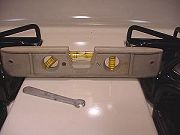
Step 15: Move the new stove in place and level the legs. While there is a hex head inside the unit, it is easier to use a pry bar and slightly lift the unit and turn the legs from beneath the unit. Don't forget to open the gas line. If there is any smell of gas, shut off the supply and call a qualified service technician. |
|
|
|
|
|
|
|
|
|
Related articles
|
||||