|
|
|
Installing Recessed Lighting in an Existing Room |
|
If it is time to get rid of the 1960's era light fixture, consider recessed lighting. Recessed lights add an elegant touch to any room and are easy to install. There are many different kinds, some that use small flood bulbs and others that use low-voltage halogen bulbs. A trip to a lighting store is in order for the best selection. In addition, recessed lights focus the light in a smaller area so you may need more lights than were originally present. Make sure your electrical circuit is sized to handle the load! In addition, recessed lighting is best installed in areas where you have access (attic or other) to the area above. Also, please note that insulation should not be place on top of the fixture unless it is rated for such. Check the package or consult with the salesperson at the store. |
 |
|
Items needed:
Recessed lights
Electrical connectors & tape Drywall "hole" saw Marking pencil or pen Stud finder (optional) |
Safety Suggestions and Tips
Ensure you electrical circuit is sized to handle new lights
Turn OFF power before making connections Locate holes between rafters/beams |
Level of difficulty
 Time Required: 1 hour
|
|
|
|
Steps |
|
|
|
|
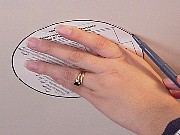
Step 1: Decide where you want to locate your lights. Some thought should be given to how many are needed and where to put them. An even distribution is best but may not fit your needs. A pattern is normally included with the lights, place it on the ceiling and trace around it. Take care to ensure that you are between the beams or rafters. |
|
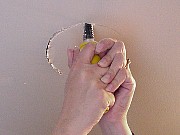
Step 2: Holding the drywall hole saw, push the saw up into the drywall. Cut around the outline. Make sure the saw is perpendicular to the ceiling as you cut. It will likely be necessary to adjust the hole somewhat when the fixture is pushed into the hole. |
|
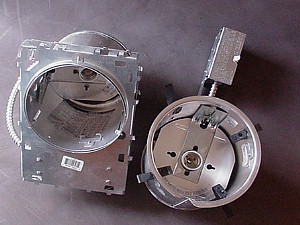
Step 3: Make the electrical connections. This activity varies from fixture to fixture but generally the wires providing current from the house need to be attached to the fixtures. If you need to expand the wiring to accommodate the new fixtures, make sure all modifications are performed by a qualified individual. |
|
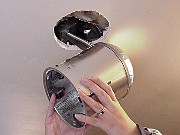
Step 4: Slide the light up into the hole (some lights have a "remodeling frame" that must first go up). Adjust the hole if necessary. Take care that the hole does not become too large. The fixture should sit flush against the ceiling. |
|
|
|
|
|
|
|
Related articles
|
||||