|
|
|
Spreading Mulch |
|
It takes a lot of time, hard work and money to establish flower beds and landscaping. The biggest ongoing problem is maintenance and weeding. This How-To will help with that but you must start at the bottom layer. In addition, do not use simple plastic at the bottom layer, it will not let water through and your plants will die. The plants should already be in place before you try this procedure. If this is a new plant/flower bed, many gardeners will spray the area with weed/grass killer before planting the new landscaping. If you do this, make sure to consult the directions to find out how long to wait before new planting takes place. |
 |
|
Items needed:
Mulch |
Safety Suggestions and Tips
Wear safety glasses
|
Level of difficulty
 Time Required: 1 hour
|
|
|
|
Steps |
|
|
|
|
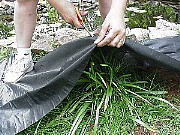
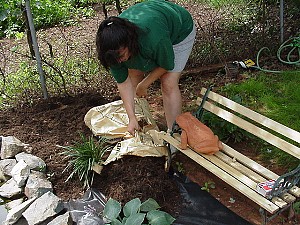
Step 1: Start at the ground layer. The ground should be clear of debris, if there is already mulch in place, rake it up and get it out of the way. Unroll your weed block textile. This special textile looks like plastic with small, square holes. The holes let water through but keep weeds from growing through it. This fabric must be installed with the correct face up so follow the instructions. With the correct face up, cut the fabric to shape. |
|
Step 2:
Gently lay the fabric over the plants and cut holes for each plant. I generally cut out an area that has the same diameter as the drip line for the plant. A tighter hole results in fewer weeds but may lead to roots growing horizontally in search of water. |
|
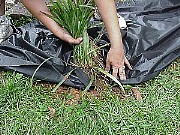
Step 3:
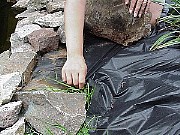
Gently work the fabric down over and around the plants. Arrange it smoothly over the ground and make sure that if there is a border you work the fabric up next to or under it, if possible. |
|
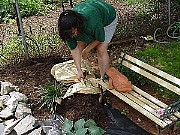
Step 4: Distribute the mulch evenly over the fabric. Normally about 2" deep but this depends on how delicate your plants are and where you live. |
|
|
|
|
Related articles
|
||||