|
|
|
|
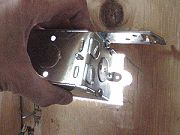
Step 5: To install the electrical box, check to see if the cover plate is for horizontal or vertical placement. |
|
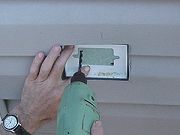
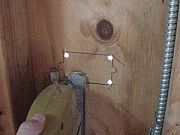
Step 6: You need to drill corner pilot holes. |
|
|
Step 7: Cut through the sheathing with a reciprocating saw or keyhole saw. |
|
|
Step 8: Make the opening large enough to allow the box to come through. |
|
|
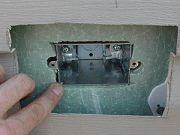
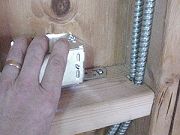
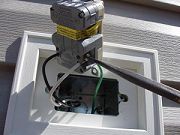
Step 9: The box will need to be mounted securely, preferably using screws. The box should protrude and be flush with the exterior sheathing. |
|
|
Step 10: Bring power to the box by running cable from the outlet back to the breaker box. Click here if you need help understanding circuit diagrams. While 15 Amp service might pass code, you are probably better off going with 12 gage wire and using 20 Amp GFCI. It may cost a few dollars more, but will allow you to more safely use power tools from the outlet. |
|
|
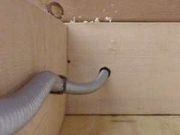
Step 11: You'll need to drill through sill plates using 5/8" speed bit drill. In this how-to, we have chosen to use armored or BX rather than Romex cable and metal boxes for a good secure weathertight fit. If you use BX cable, don't forget the anti-short or insulated bushing. If you have part of the cable exposed to sunlight (such as below the siding along the foundation), make sure that you use UF/sunlight rated cable. You may also need to use conduit. Check with your building codes as standard two wire may not be enough and three wire may be needed. |
|
|
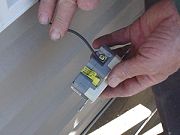
Step 12: To attach outlet, it is a good idea to coat the wires to an anti-oxiding coating. This will help years down the road from excessive oxidation forming and causing a break in the connection. |
|
|
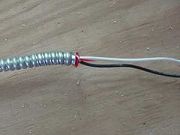
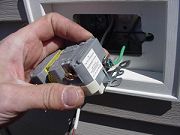
Step 13: You want to attach the hot lead and neutral |
|
|
Step 14: Also, the ground wire. Place in box and attached cover plate. To tie into breaker box, we recommend you seek a licensed electrician. |
|
|
|
|
|
|
|
|
|
Related articles
|
||||