|
|
|
Replacing Molding around Exterior Doors |
|
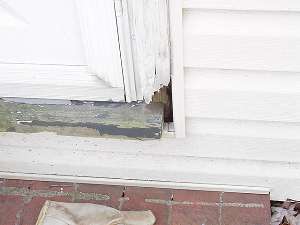
The molding around your exterior doors is generally called "brick molding." Even when it does not abut any brick! This molding is prone to rot at the bottom where it generally contacts a threshold or a concrete stoop. Fortunately, it is easy to replace. |
 |
|
Items needed:
Hammer
Chisel Nail set Paint brush Back saw Miter box Utility knife |
Safety Suggestions and Tips
Check for rotten wood trim
Check for damaged siding and subsiding |
Level of difficulty
 Time Required: 4 hours
|
|
|
|
Steps |
|
|
|
|
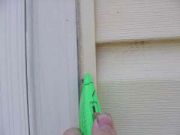
Step 1: Generally the gap between the molding and the siding is filled with caulk. Take a utility knife and cut through the caulk. If you have vinyl siding, make sure that you don't cut the vinyl! |
|
|
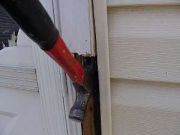
Step 2: Starting at the bottom, pry the molding loose. Make sure that you do not disturb the siding. One thing to keep in mind: the trim is normally nailed together at the top corners. |
|
Step 3: This is usually done by driving a nail down through the top piece into the side piece. You may have to pull the trim loose from this nail. |
|
|
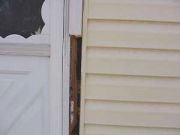
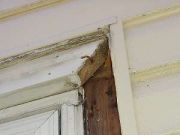
Step 4: After you get the piece loose, pull the nail through and out of the top piece of trim. Inspect the boards you have exposed for rot. |
|
|
|
|
|
|
|
Related articles
|
||||