Coping Crown Molding
Crown molding is the trim that normally goes between the wall and ceiling. Inside joints for crown molding are normally "coped." This includes cutting the trim to fit the profile of the trim on the adjacent wall. This process is as an art so practice on a scrap piece first. Please note that this particular process is different from coping base and shoe molding.
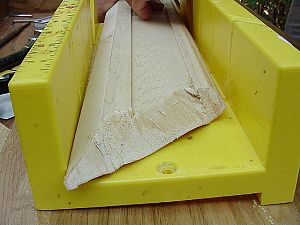
Step 1:
Carefully mark the trim and place it in the miter box upside down and backwards. Place the mark you made in front of the 45 degree slot and, using a back saw in the 45 degree slot, cut the molding to length. This type of cut will expose the profile of the molding so that you may cut it with a coping saw.
Step 2:
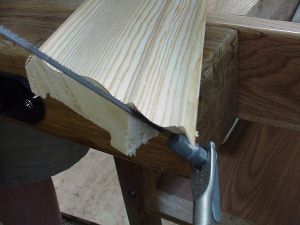
In order to allow the molding to fit tightly in the corner, you must "back-cut" the molding with a coping saw. Secure the molding on a table or other stable surface and, holding the coping saw at a 45 degree angle to the molding, begin cutting along the profile. If the profile is a particularly complex one, you may have to cut off part of the profile from time to time to allow the saw to follow the contour.
Step 3:
The back of the trim will end up looking like it was shaved off at a 45 degree angle. Inspect the cut carefully for places where the profile was missed. One area not properly cut will make other parts of the profile not fit snugly.
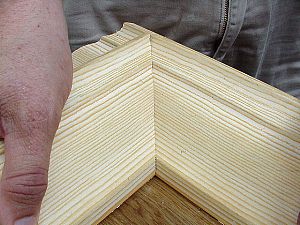
Step 4:
Take the piece of trim and test-fit it into place. Unless you have a lot of practice or are lucky, there will be gaps. Lightly mark the molding where the gaps are and "adjust" the profile. A file, sandpaper or utility knife may be used to do this. The amount of fine-tuning required depends on how the molding is to be finished. If the trim is to be painted, you may cope the molding, fill the gaps with painters caulk or putty and then touch up the exposed areas. If clear finish is to be used then you must adjust your cuts carefully as heavily-puttied joints are immediately obvious.