Using PVC Conduit for Electrical Wiring |
|
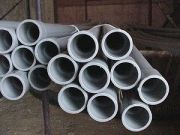
For a safe and long-lasting solution to electrical wiring, you can install PVC (non-metallic) conduit. You may find that it is less expensive to run conduit for heavy duty circuits to the stove and dryer as compared to buying a full 250 ft roll of Romex or BX cable, but CHECK THE LOCAL BUILDING CODES! The conduit is used in conjunction with single-stranded wire. You can run conduit yourself (assuming you are the homeowner, have a licensed electrician willing to work with you and local codes allow for this). Compared to metallic conduit, PVC is less than 1/3 the weight and easier to work with. |
 |
|
Items needed:
Conduit and connectors
Single strand cable Conduit clamps Screw driver Pliers Fish tape Electric drill Spade bit or hole saw Safety glasses |
Safety Suggestions and Tips
Caution using ladder
Use eye protection with power tools Hire an electrician to connect to breaker box |
Level of difficulty
 Time Required: 8 hour
|
|
|
|
Steps |
|
|
|
|
Step 1: First you will need to plan your route from the breaker panel to the receptacle box. It is important to understand that pulling wiring depends on the number of bends, so look for options which will minimize bends. Typical conduit sizes for residential application are: 3/4", 1" and 1-1/2" diameter, but can be up to 6" in diameter. Remember, the larger the wire size (for example,10 or 6 gage strands), the larger the conduit you will need. Let the electrician determine which size conduit you will need. |
|
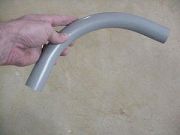
Step 2: In turning corners, there are 45 and 90 degree elbows, but you can also purchase 30 and 22 degree elbows. |
|
Step 3: With the help of a friend, layout the route. |
|
Step 4: Measure the distances needed for each section of conduit. |
|
|
Step 5: You should also locate areas and runs that are easily accessible and have a clear line of sight. |
|
|
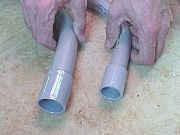
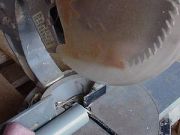
Step 6: To cut the conduit you can simply use a carpenter's handsaw or power miter box. |
|
|
Step 7: Measure from the end of the conduit with the coupling and remember to start from the inside edge allowing for 3/4" to 1" recess. Depending on the number of bends, you will need to occasionally use a junction box or pull elbow. |
|
|
Step 8: For simplicity, you should plan to include a junction box after two elbows. Actually there is more to this, see the reference at bottom of the page on pulling wire calculator. |
|
|
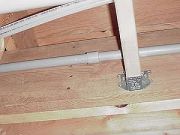
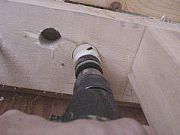
Step 9: At headers and joists you will need to drill through for access. While a spade bit will work for smaller conduit (up to 1 1/4"), a hole saw is required for larger holes. For concrete foundations, you may need to rent or borrow a larger drill and masonry bit. |
|
|
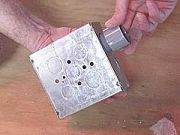
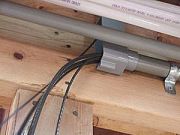
Step 10: At the junction box, you need to punch out for a coupling, but here's is where you should probably stop and let the electrician help you. And don't forget - Be sure the power is OFF before removing breaker panel cover! |
|
|
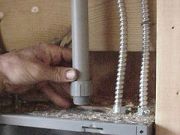
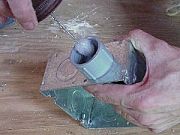
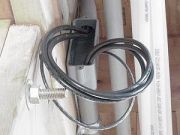
Step 11: Start at one end of the run, typically the receptacle box. Here, a male coupling adapter is used to connect to the metal box. |
|
|
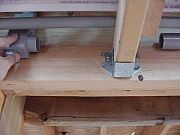
Step 12: Dry fit the conduit and coupling, then disassemble and apply solvent glue. Reassemble the unit, giving the pipe a quarter turn twist and let this set for 10 minutes. As you proceed, attach conduit clamps at least every 10 feet or as necessary. |
|
|
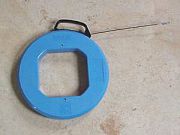
Step 13: With the conduit in place, you need to measure the length of the wire needed. You can approximate this with a tape measure, or run a single wire or fish tape through for a measurement. |
|
|
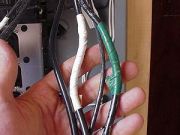
Step 14: In order to pull wire, you first need to assemble a bundle. Start by wrapping the stands around a post. Then stretch out the cable to length required, being sure to mark the neutral and ground wire with white and green tape at each end. You will need a hot, neutral and a ground wire. |
|
|
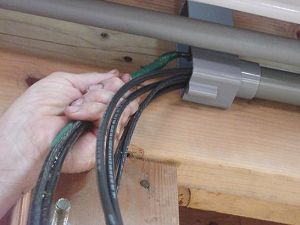
Step 15: Start by feeding the fish tape from one end of the conduit run and attaching your wire strand as a bundle. To make the wire pull more easily, coat the wire with wire-pulling lubricant as you feed it. At the junction box, pull the bundle through the first leg and then feed the fish tape through the second leg. |
|
|
Step 16: Now pull the bundle through the second leg and pull the slack. From this point, you should let the licensed electrician for work inside of the breaker box and make connections at the receptacle box. Even if you turn off the main breaker, the line side of the panel is still HOT! Accidentally touching these lugs with the wire or fish tape will cause sparks to fly. Be sure you are wearing eye protection. |
|
Reference: Conduit specifications from Carlon Electric code update from Journal of Light Construction Using conduit from electrician.com Glossary of electric terms from Levitron Electrical wiring FAQ from FAQ.org |
|
|