Utility Door Installation | |
|
A steel utility doors can be are easily installed as part of a room addition, garage makeover or barn. With properly sized framing, the pre-hung jambs will fit easily. With some care during the shimming, you can get a perfect close and good weather stripping seal. |
|
|
Items needed:
Utility door Caulk or sill barrier Wood shims 2-1/2" screws Screw gun Electric drill and bits Level |
Safety Suggestions and Tips
Once the shipping clips are removed, hold the door from swinging open
when moving it in place. Do not push in corners flush to wall as this will force the door out of square with the jamb and cause gaps in the weather seal. |
Level of difficulty  Time Required: 1 hour |
|
Steps |
|
|
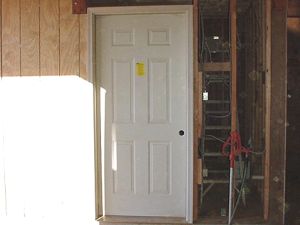
Step 1: Check to see that your door will easily fit within the opening. The opening should be at least 1/2" wider than the outer extent of the door jamb. The brick molding can be removed, depending on your installation. |
|
|
Step 2: Remove the door clips. These hold the door tight for shipping. Carefully pry loose the plastic grips without damaging the door jamb. |
|
|
Step 3: On the bottom of the door sill, pry loose the cardboard or wooden shipping skid. Be sure to pull any staples. |
|
|
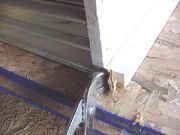
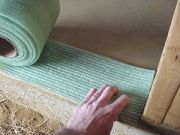
Step 4: To seal below the threshold, either caulk the base of the threshold or lay a sill barrier. |
|
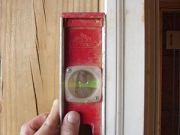
Step 5: Slide the door in place into the opening in the framing. Besure not to drag the caulk or move the sill barrier. Check for level on the vertical jambs. |
|
Step 6: The threshold also needs to be leveled. Remember not to force the jamb out of square. |
|
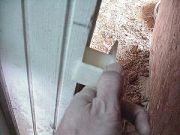
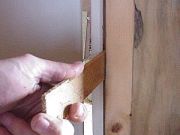
Step 7: To adjust the level, use pairs of wooden shims between the door jamb and the wall framing. This is the tricky part. You need to be sure not to bow the mid section of the door and also add sufficient shim thickness to keep the door in place. When pushing the jambs into the opening, do not push too hard on the corner to the extent that the plane of the jambs become misaligned with the door. Basically if you push on the top of the jamb above the handle, a gap will appear in the lower section of the door. |
|
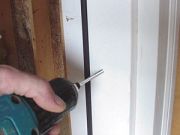
Step 8: To secure the jamb, pre-drill at least 4 holes in each of the jambs. The manufacturer may recommend, but remember it is just these few screws which will keep the door in place. Use a drill bit the diameter of the shaft of the 2-1/2" screws. |
|
Step 9: Screw the jambs in place. On exterior doors, use a galvanized/coated or stainless screw. That's it! |