Installing a Programmable Thermostat |
|
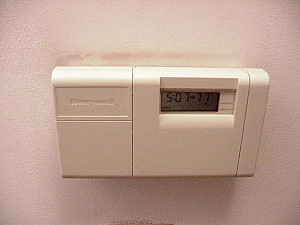
Programmable thermostats are relatively inexpensive and are easy to install. They may also save you money as they always remember to turn the heat down at night, using less energy. It is also nice to wake up to a warm house. Be aware, however, that you need to ensure that the thermostat you pick is compatible with your heating/cooling system. Make sure you check the package before you take home the wrong unit. |
 |
|
Items needed:
Screwdriver |
Safety Suggestions and Tips
Follow directions on package
If the old thermostat has a glass tube with mercury inside, do not
throw it in the trash, contact your local waste management company
for instructions.
|
Level of difficulty
 Time Required: Variable
|
|
|
|
Steps |
|
|
|
|
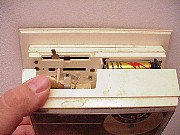
Step 1: Turn power off at system or breaker box. Remove the faceplate of the old thermostat. Most pry off with a coin or screwdriver. Under the faceplate you will normally find several screws that secure the unit to the wall or a mounting bracket. Remove the mounting plate, if present. |
|
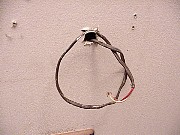
Step 2: Remove wires from the old thermostat. If there are more than two wires you should label them. Also, form the wire in a loop or tie it to something so that it does not fall back into the wall. |
|
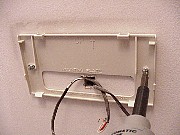
Step 3: Secure the new thermostat to the wall. Most replacement units mount on the wall using plastic anchors. Either drill or poke an appropriate sized hole for the plastic anchors and push them in. Screw the mounting bracket or base of the unit to the wall. |
|
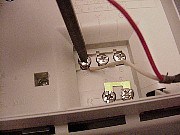
Step 4: Connect the wires to the new thermostat. Check the directions in the package on which wires go where. Some systems only use 2 wires (heating) and some systems use 4 or more (full HVAC/Timer). Install unit in place, install batteries, if necessary, and turn power back on. Now, check the directions and program the thermostat. |