Installing a Subfloor |
|
Subflooring is needed for most floors to span the joist and provide a basis for finish wood floor, vinyl tile or carpeting. You will want to make surer that you not only make this strong and sound, but also to avoid a squeak which will haunt you for years. Also make sure you check your local building codes before starting. Some are very specific about materials and methods. |
 |
|
Items needed:
Screw gun or electric drill |
Safety Suggestions and Tips
Wear safety glasses and gloves
Check local codes before starting. Many are very specific about subfloor requirements. |
Level of difficulty
 Time Required: 2 hours
|
|
|
|
Steps |
|
|
|
|
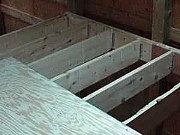
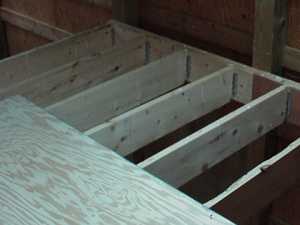
Step 1: Gather your materials, but be sure that you are using "subflooring". This is similar to standard plywood, but has a tongue and groove. The thickness is a nominal 3/4 inch. Do not use OSB (oriented strand board). You will need to orient the sheet layout. You will want the grain of the plywood to be perpendicular to the joists. |
|
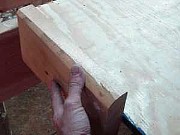
Step 2: The next step is to measure and cut to length if the joist are not 96" on center. Use a chalk line or pencil and straight edge measuring to center of the joist. Be sure to measure from the top edge, not the edge on the tongue. You will want to stagger the joints between pieces. You may need to cut around studs or cut circles for pipes. One the second course, start with a piece 48" for a tiled pattern. |
|
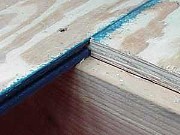
Step 3: You need to line up the tongue in the piece previously secured and the grove of the next piece. This can be a little tricky as the plywood tends to bow somewhat. A helpers foot strategically placed should help the process. You will need to tap the plywood into the grove using a block of wood to protect the groove. Be sure to leave a 1/8" gap between pieces for expansion. Also, mark the centerline for the next piece of plywood. |
|
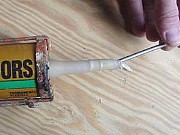
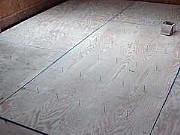
Step 4: To permanently hold down the subflooring, it is best to use adhesive. There is special adhesive for subflooring which is more workable than other construction adhesives. Standard construction adhesive will not allow you to slide the tongue into the groove as easily. Don't forget when you are done to place a large nail in the adhesive tube. This will make it easier to reuse this next time. |
|
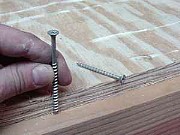
Step 5: While nailing the floor with a nail gun may be adequate, you should consider screwing down the subflooring with screws. This allows you to pull down the corners and centers and ensure good contact with the joist. |
|
|
Step 6: You need to match the screw length with the number of subflooring layers. A 2-inch screw is good for one layer and 3-inch for two layers. Screw should be set 6 to 8 inches apart (check local codes). Screws are driven with screw gun and set below the surface of the plywood. |