Replacing a Damaged Shingle |
|
If, in the course of inspecting your roof, you find a damaged shingle, it is a good idea to replace it. The procedure is easy. First a note about safety: FALLING FROM THE ROOF CAN KILL OR INJURE YOU! Don't work on the roof if you don't have the appropriate safety equipment like a safety harness. If you are uncomfortable on the roof, call a contractor. These instructions are for regular fiberglass/asphalt shingles. |
 |
|
Items needed:
Scraper |
Safety Suggestions and Tips
Be careful, working on the roof is dangerous.
Work on the shingles when they are warm, it is much easier. |
Level of difficulty
 Time Required: 1 hours
|
|
|
|
Steps |
|
|
|
|
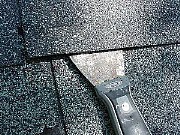
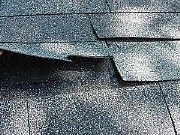
Step 1: This procedure is best done while the shingles are warm and flexible. If you're working during winter, wait until the sun warms the shingles up. Working with a long scraper, pry the tabs of the damaged shingle loose. The shingles are held down by a tar strip. Now pry the tabs from the shingles one course up which cover the damaged shingle. Be careful not to tear these shingles. |
|
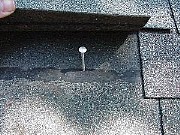
Step 2: Take the flatstock or nail-puller and pull the roofing nails from the damaged shingle. It may take some effort. This isn't recommended, but if you can't get the nails out, remove the bits of shingle from under the head of the nail and drive the nail flat. |
|
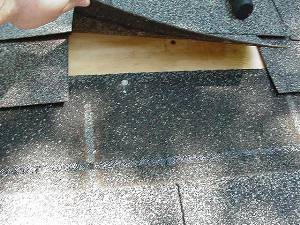
Step 3: Slide out the damaged shingle and make sure that the roof deck is undamaged. If it is damaged, you should probably call a professional. |
|
Step 4: Slide the new shingle up into position and, just above the tar strip, secure the shingle with 3 roofing nails. |