Rewiring a lamp |
|
Building or rebuilding a lamp is an easy project. Whether your lamp quit working or you just want to build one, it's an inexpensive way to create a unique fixture. This guide will show you how to fix the problem and tell you what items you need. |
 |
|
Items needed:
Lamp kit |
Safety Suggestions and Tips
Wear safety glasses
Be careful to check that the fixture is working properly after you have finished. |
Level of difficulty
 Time Required: 2 hours
|
|
|
|
Steps |
|
|
|
|
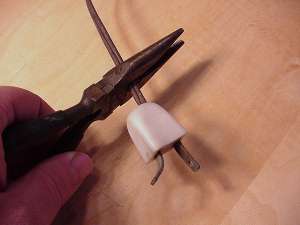
Step 1: Take the lamp to a place where you can work on it. Take the shade off and clip the plug from the lamp cord |
|
Step 2: Remove the wire (harp) that holds the shade. Remove the light socket from the threaded rod (turn it to the left). Holding the socket, pull the wire out of the lamp. |
|
Step 3: Take the wire from the light kit and begin pushing it into the threaded rod that you removed the wire from above. This step can be especially trying and you may need to make several attempts. |
|
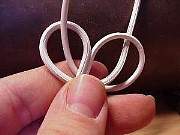
Step 4: Pull the two conductors slightly apart and push them through the bottom "cup" of the fixture. Next tie an "underwriters" knot in the wire. This will require that you separate about 3" of the wire. Thread the cap back onto the rod. |
|
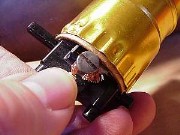
Step 5: Strip about 1/2" of each conductor. Twist the stranded copper tightly and bend a hook into each wire. Attach the wires to the terminal screws, the wire with the ridge on it to the silver terminal, this is the neutral wire. |
|
|
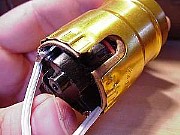
Step 6: Push the fixture into the top part of the housing. Next, push the bottom cup onto the socket body, it should "click" together. Plastic models may screw together. Next place this body onto the threaded stem and you are done! |