Sawn Baluster Porch Railing |
|
Why not add a little Victorian millwork to your porch? Even if you do not own a band or scroll saw, you can add old-style ornamental carpentry look in this weekend project. Once very popular in nineteenth-century homes, decorative millwork is being revived. In this article we'll show you how to cut your own sawn balusters and install a porch railing. You can be creative and distinguish your property from the pressure-treated sea of 2x2 stick balusters, seen everywhere. |
 |
|
Items needed:
Band or scroll saw
Ruler and marker pen Screw driver Table saw Sandpaper Drum sander Primer and paint |
Safety Suggestions and Tips
Caution using ladder
Use eye protection with power tools |
Level of difficulty
 Time Required: 8 hour
|
|
|
|
Steps |
|
|
|
|
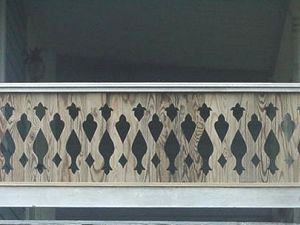
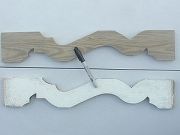
Step 1: The design for your ornamental sawn baluster determines the look and feel for the porch. You can exaggerate the height, openness and style depending on the pattern. |
|
Step 2: You don't even need a hole saw to create the effect. Sawn balusters are typically offered in the following sizes: Widths: 3-1/2, 5, 7 and 8 1/2" |
|
Step 3: The overall height from the deck or flooring of the a typical railing height is 34-38". Be sure to check local building codes for the minimum required height. Use this to calculate the length of the baluster needed subtracting the thickness of the hand and shoe railing and clearance space. The space between the deck or flooring and the bottom rail should be 4", although some local building codes may allow more space. Remember you don't want an infants head to get stuck there. We made up this design. For a larger image which you can download and create your own template, click here. This will open a new window where you can "Save Picture As" or "Save Image As". There are many variations. |
|
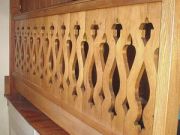
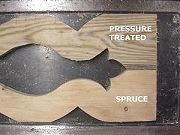
Step 4: Sawn balusters price can be found in a wide variety of styles and the prices vary depending on the size and material. Less expensive ones can be found for $7-12 whereas the more intricate and larger ones are $20-27. Two of the best materials are kiln-dried redwood or cypress. This was not readily available for our project and we used conventional pressure-treated pine. |
|
|
Step 5: With the pattern selected, cut the stock to length with a power miter or table saw. |
|
|
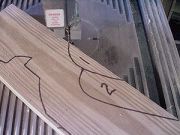
Step 6: Trace the pattern onto the stock material and be sure to avoid any knots. Normally a pencil works, but for pressure treated a permanent marker is better. |
|
|
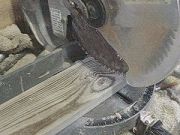
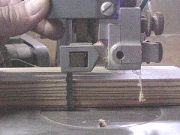
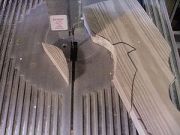
Step 7: The scroll work is best done using a scroll saw. As our design did not have small radii cuts, we were able to use a band saw using the 1/4" blade. With the saw off, set the blade guard height to be about 1/4" above the stock and be sure the tension is correct. |
|
|
Step 8: Start by cutting away smaller sections from one side. |
|
|
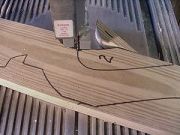
Step 9: Then the other side. |
|
|
Step 10: Cut out the larger sections. |
|
|
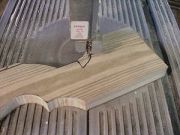
Step 11: Removing the small sections carefully. |
|
|
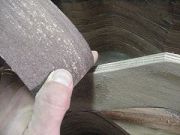
Step 12: Finish sanding by hand, or by using a trim or drum sander. |
|
|
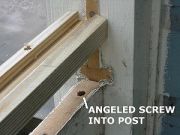
Step 13: The hand and shoe rail can be made of 2x4, 2x6 or 5/4 stock. We used 5/4 fir for the base of the shoe rail. The hand rail is two pieces, cut from 2x4 and 5/4 stock with an angle and beveled on the top. Both rails must be securely fastened to the post. Note that this must be very strong to support the lateral weight of over 200 pounds. This can be accomplished through a series of screws. |
|
|
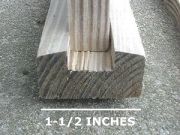
Step 14: The balusters slide into the mortise in the shoe rail. |
|
|
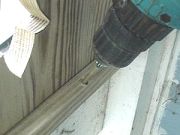
Step 15: It takes several hands to to this done, so get some help on this. On the last baluster, you will need to rip the width to fit. Once in place, secure the rails with weatherproof screws every 18 inches. |
|
|
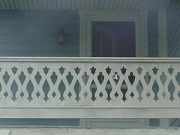
Step 16: Once you have the railing in place, use a good quality primer and follow with two coats of paint for the final step. |
|
Reference: You might also consider purchasing the book Ornamental Carpentry by Ben Knapp for more design ideas. |
|
|


)
)