Installing Fiberglass Insulation |
|
This article covers how to install fiberglass insulation. It is very straightforward but safety is paramount. You should wear gloves, a long sleeve shirt and (at least) a dust mask if you are installing the insulation in a confined area. The other thing to consider is the "R" value of the insulation. Different "R" values provide different levels of insulation and also fit into different kinds of walls. R-13, for instance, is usually used in a 2x4 wall. |
 |
|
Items needed:
Staple Gun |
Safety Suggestions and Tips
Wear safety glasses
Cut carefully |
Level of difficulty
 Time Required: 1 hour
|
|
|
|
Steps |
|
|
|
|
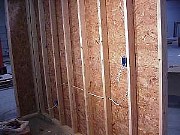
Step 1: Make sure the area to be insulated is clean, dry and free of debris. If you are insulating an outside wall, make sure that any places where air may infiltrate is sealed. |
|
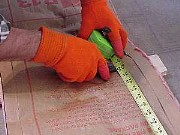
Step 2: If necessary, cut the insulation to length. It is best to put a piece of wood under the area you want to cut. Compress the insulation with your hand and use a razor (utility) knife to cut the facing and then the fiberglass. |
|
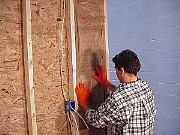
Step 3: Take the insulation and place it between the studs. The vapor barrier (the paper part) should face towards the living space. Make sure that all of the insulation is pressed into the bay. If there are switch or outlet boxes present, you will need to cut the insulation to fit around them. |
|
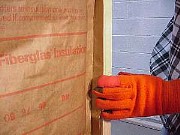
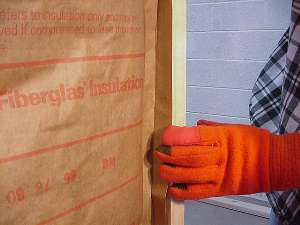
Step 4: Using your gloved hand, open up the paper flap at the edge of the insulation. Hold the insulation against the stud and staple the insulation in place. |