Tile Grout Repair |
|
Most tile surfaces have grout between the tiles. Grout that is not cared for deteriorates over time and looks awful. Fortunately, it is pretty easy to fix. These directions pertain mainly to fixing small patches of grout. However, it is possible to remove all of the grout in a tub surround, for instance, and re-grout it. |
 |
|
Items needed:
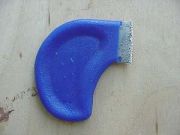
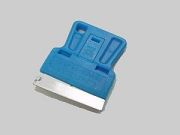
Grout Saw
Sponge Pre-mixed grout Utility knife (depends on conditions) Grout sealer (good idea) Small brush |
Safety Suggestions and Tips
Do not let grout haze completely harden
Apply sealer to maintain grout |
Level of difficulty
 Time Required: 2 hour
|
|
|
|
Steps |
|
|
|
|
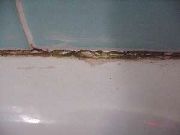
Step 1: Identify the grout lines that need to be repaired. Sometimes they will look crumbly, other times the grout will become permanently stained. |
|
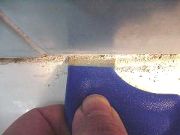
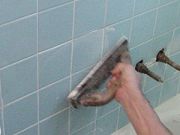
Step 2: Start with one of the grout lines and use the grout saw to grind out and remove the old grout. |
|
Step 3: Use a sawing motion, drawing the saw towards you first. Be careful not to scratch the tile and stay in the grove. Grind out the grout to remove all of the stained layer. |
|
Step 4: If the grout lines are too tight for the grout saw, use a scraper or utility knife (Be careful not to cut yourself). |
|
|
Step 5: Clean the grout lines with a sponge or a small disposable brush. Let the exposed grout dry an hour and brush once more. |
|
|
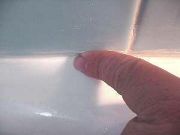
Step 6: Fill in the joints with pre-mixed grout. One trick is to simply wet your finger and use it to force the grout into the joint. |
|
|
Step 7: Use as much grout as necessary to bring the grout to the level of the existing grout. Make sure the joint is smooth and has no gaps in the grout. |
|
|
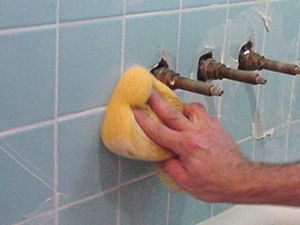
Step 8: Whenever the excess grout begins to form a whitish haze on the tile (usually an hour or so) you need to clean it up. Take a damp sponge and gently wipe away the excess. Take care not to disturb the grout in the joint. It is not hard yet and if you wipe across it, you will wipe it onto the tile. You may have to take a soft cloth and polish away the excess grout. |
|
|
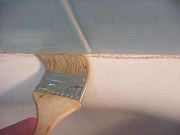
Step 9: Let the grout dry for 48 hours (check the package for details) before exposing the grout to moisture. It is normally a good idea to seal the grout with a silicone grout sealer but some pre-mixed formulas have a sealer in them. Check the package. |
|
|