Repair and Clean Gas Grill |
|
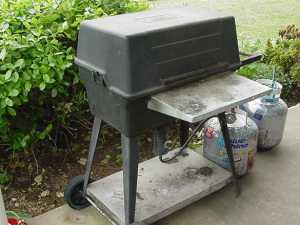
With all that BBQ sauce and being outside for a few years, your outdoor gas grill probably could use some cleaning. The burners tend to rust over time and may need replacing. Learn how to clean it up and make those repairs. |
 |
|
Items needed:
|
Safety Suggestions and Tips
Shut off the gas tank
Use chemical proof gloves Avoid cleaning agent fumes Always check for leaks in line Replace all defactive parts Have a trash bag handy |
Level of difficulty
 Time Required: 2 hour
|
|
|
|
Steps |
|
|
|
|
Step 1: The first step examine the grill and be sure that the legs are secure. Take a close look at the hoses and fittings on the tank. You can check for leaks in the line by brushing on some soapy water and look for bubbling. Look for cracks in the line hoses. |
|
Step 2: Read this article on grill safety tips from the US Consumer Product Safety Commission. If there are leaks, do not hesitate to buy replacement parts. Don't wait for a fire or explosion! |
|
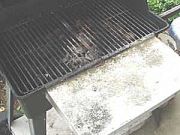
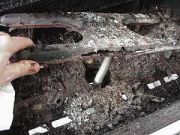
Step 3: You will probably notice that there has been significant grease build-up both on the exterior shelf, the grill rack and on the lava rocks. |
|
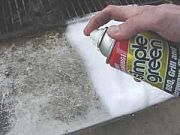
Step 4: To clean the grill, use a cleaner, such as Simple Green. |
|
|
Step 5: Shake the can real well. Liberally spray the grill and shelf with an even coat. |
|
|
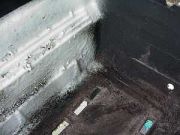
Step 6: Also apply a coat to the interior of the grill. Let this sit for
a few moments, but not too long. |
|
|
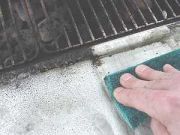
Step 7: You will need to wait a few minutes for the foaming action to work. Then using a scrubbing pad, clean-off the foam and grease. You may need a second coat for those stubborn areas. |
|
|
Step 8: With the grill cleaned, you need to examine the burner for rust. This one was overdue for a replacement. Measure it before throwing it in the trash so you can buy the correct replacement. |
|
|
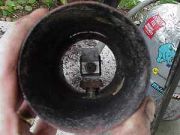
Step 9: Check the orifice and, if need be, use an old tooth brush to clean off any scaling or deposits. |
|
|
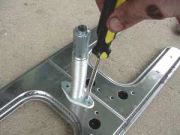
Step 10: If the burner needs replacement, you will first need to assemble the new unit and adjust the flexible hose length to match up with the orifice. |
|
|
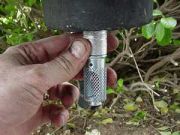
Step 11: Now, carefully align the hose and drop the burner in, being careful to line up with the orifice. |
|
|
Step 12: When you fire up the grill, the flame should be blue, no orange flames. Be sure
you follow gas grill safety
tips. |
|
|