Pouring a Concrete Pad |
|
Whether providing a solid foundation on which to put your stairs or keeping your feet out of the mud in front of a door, a concrete pad is an easy (if labor-intensive) project. Working with concrete can be a physically demanding task as the bags are heavy and once water is added it gets worse. Fortunately, it doesn't normally require many bags to pour a small concrete pad. Make sure you read the directions on the concrete. Portland cement can burn your skin and is hazardous to breathe. Take appropriate safety precautions. One other thing: if the slab you are working on is longer than about 4 feet you will need expansion joints to prevent the slab from breaking up. |
 |
|
Items needed:
Concrete
Shovel 1x4 lumber Saw Stakes Nails Wheelbarrow Hoe Trowel |
Safety Suggestions and Tips
Concrete normally contains Portland Cement which can burn your skin and is hazardous to breath.
Please follow all safety precautions when mixing and handling concrete.
|
Level of difficulty
 Time Required: 2 hours
|
|
|
|
Steps |
|
|
|
|
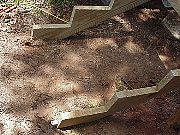
Step 1: The first step when pouring a pad is to locate where it has to be and how big it needs to be. In this case, we are pouring a pad for the stairs to rest on. The pad itself will be at ground level so it does not have to be big enough to act as a first step. |
|
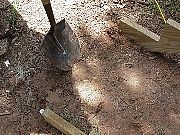
Step 2: When pouring a simple pad, it is acceptable to pour the concrete directly onto the soil but we chose to dig down a bit in order to make the pad a bit thicker. This will help keep it in place and also resist cracking. In any event, the slab should be at least 4 inches thick. |
|
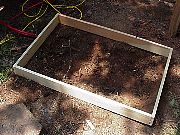
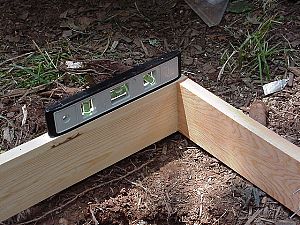
Step 3: Once the dimensions of the pad are known and any excavation performed, it is time to build a form for the concrete. For most small pads, 1x4 boards are sufficient to support the concrete. Thicker/wider pads may require 2x4's for additional support. Build the frame with nails appropriate for the job. If the form is to be rectangular, ensure it is square and true. |
|
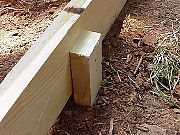
Step 4: Once the form is built, it needs to be secured to the ground so that it does not move when the concrete is poured. "Surveyor" stakes are available at most home-improvement stores or you can easily cut your own. Drive one stake at each corner but do not secure it to the form yet. |
|
|
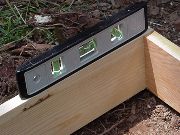
Step 5: At this point, the form needs to be leveled up and attached to the stakes. The easy way to do this is to secure the high side to the stakes and then raise the low side to level the form. Fill around the outside of the form if gaps occur with dirt. Ensure that the stakes are lower than the top of the form. |
|
|
Step 6: Another consideration is reinforcing the concrete. Since these pads aren't very thick and are above the frost line, they will be subjected to a fair amount of stress. This can cause the slab to crack. In order to prevent this, put wire mesh or reinforcing rods into the slab. Wire mesh is probably better for this application as it is less difficult to manipulate than reinforcing rod. In either event, you need to ensure that the rods or mesh "float" in the middle of the pad and do not sink to the bottom. Small plastic "risers" are available for this (We used re-bar in picture as wire mesh wouldn't show up). |
|
|
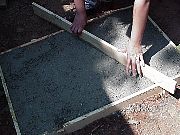
Step 7: Follow the instructions on the package to mix the concrete. Pour it into the form until it reaches the top. Use a "screed" (usually a board) to level the top of the pad. If a smooth finish is desired, the level surface may be "worked" with a trowel to bring the "cream" to the top. If not, wait a bit and brush the surface with a broom for a rougher finish. Cure the concrete according to the manufacturers instructions - usually by covering with plastic for 7 days. |