|
|
|
|
|
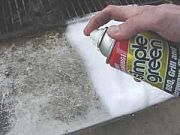
Step 5: Shake the can real well. Liberally spray the grill and shelf with an even coat. |
|
|
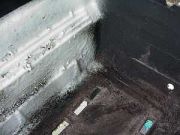
Step 6: Also apply a coat to the interior of the grill. Let this sit for
a few moments, but not too long. |
|
|
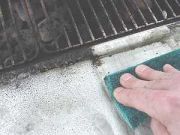
Step 7: You will need to wait a few minutes for the foaming action to work. Then using a scrubbing pad, clean-off the foam and grease. You may need a second coat for those stubborn areas. |
|
|
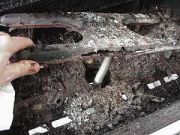
Step 8: With the grill cleaned, you need to examine the burner for rust. This one was overdue for a replacement. Measure it before throwing it in the trash so you can buy the correct replacement. |
|
|
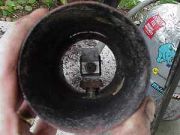
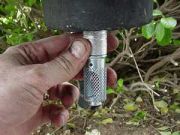
Step 9: Check the orifice and, if need be, use an old tooth brush to clean off any scaling or deposits. |
|
|
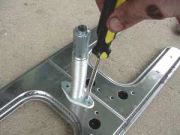
Step 10: If the burner needs replacement, you will first need to assemble the new unit and adjust the flexible hose length to match up with the orifice. |
|
|
Step 11: Now, carefully align the hose and drop the burner in, being careful to line up with the orifice. |
|
|
Step 12: When you fire up the grill, the flame should be blue, no orange flames. Be sure
you follow gas grill safety
tips. |
|
|
|
|
|
|
|
|
|
Related articles
|
||||