Install a Cat Door |
|
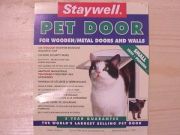
Tired of continually opening and closing the door and then have the cat starring in the window 30 seconds later, wanting to get back in? Let the cats open and close their very own door! For under $30 you can purchase a cat door that will fit the bill nicely. |
 |
|
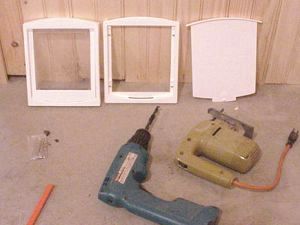
Items needed:
Screw driver
Jig or saber saw Electric drill and bits RotoZip (optional for metal sheathing)
|
Safety Suggestions and Tips
Use a stud finder with AC locator.
Avoid walls with electric outlets. Use safety glasses/goggles |
Level of difficulty
 Time Required: 2 hours
|
|
|
|
Steps |
|
|
|
|
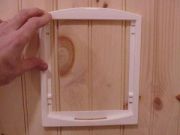
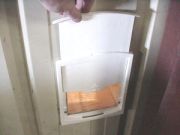
Step 1: This unit has a two-way door and magnetic strips to keep the door closed and reduce drafts. The frame of the door is white but the door is of weather-resistant thermoplastic construction. |
|
Step 2: Use care when situating the door. Electric wiring, plumbing and studs need to be avoided as the hole for the door goes completely through the wall. We recommend using a stud finder to avoid studs. Some versions also reveal the presence of hidden wiring. Trace around the inner perimeter of the opening to mark the hole. To ensure that the doors swing freely, enlarge your trace at least 1/8" on all sides. |
|
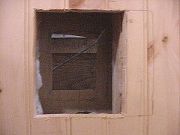
Step 3: Rather than cutting the entire opening, cut a smaller section, just be sure that there is not a stud. A jig saw with a 3/8" starting hole drilled first does nicely. If there is any possibility of an electric cable in wall, use a circular saw with the blade set to the depth of the paneling or drywall. |
|
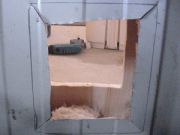
Step 4: As luck would have it, our planned opening ran right into a 2x4 stud. The opening was relocated to left and then cut to the full extent. |
|
|
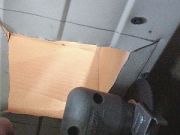
Step 5: The exterior of our installation is sheet metal. Several 3/8" pilot holes were drilled in the center and metal shear snips used to make the rough cut. The opening is approximately 1" less on all side from the desired hole. For vinyl siding, use a utility knife to enlarge the opening. For wood siding, use a jig saw. |
|
|
Step 6: Using the cutting wheel of a RotoZip, the opening in the sheet metal was enlarged to the full extent. Be sure to use safety glasses/ goggles as this will send sparks flying over three feet! You can use the cutting wheel to feather any sharp edges. |
|
|
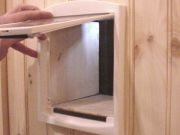
Step 7: Align the inside door unit. Shift left and right to make sure that the doors swing freely. Shift up and down such that the door does not drag and also opens completely. |
|
|
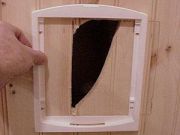
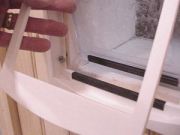
Step 8: The door should swing freely in both directions. Because of a very tight fit, we sanded the outer edge of the clear plastic door slightly to keep it from binding inside the wall. |
|
|
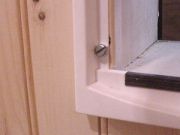
Step 9: The unit comes with through bolts and nuts, but were not long enough for this application. Mark the hole for a screw and drill a small pilot hole. Then secure the frame into the wood work using pan head screws. |
|
|
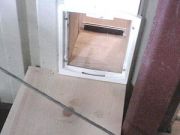
Step 10: The outer door is secured to the sheet metal using pan head screws. Drill a pilot hole first. |
|
|
Step 11: A walkout board may be needed for your cat to perch. |
|
|
|
|