Anchor a Sill Plate in Concrete
Wood to Concrete? There are many ways to attach your sill plate to concrete. In this article we present some of the options and show you how to attach the sill and keep it in place.
Step 1: Selection of what to use
Before you start you job, you will want to learn about some of the many options available for anchoring a sill plate to concrete. Each type of fastener has different advantages, strengths and costs. Be sure to check with local building codes and always use proper eye protection. You might want to start reading about your options at ConcreteFasteners.com which has numerous types of anchors. Check the product selector. Other companies include USAnchor, Wej-it and StrongTie, to name just a few.
Listed below are just some of the different products available:
Concrete screws
Wedge
anchor
Strap anchors from
Strong-Tie
Concrete anchors from
Strong-Tie which use Anchormate
Wej-it anchor
Calculate the distance between using spreadsheet.
Online catalog from Wej-it
Thunder stud
by Marksmen
Sleeve
anchor
Lag
shield anchor
Leadwood
screw anchor
Nylon
Nail-it
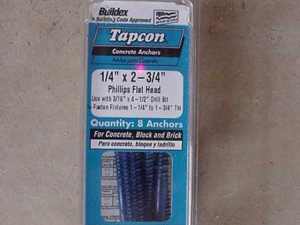
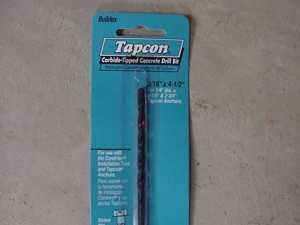
Tap-Con
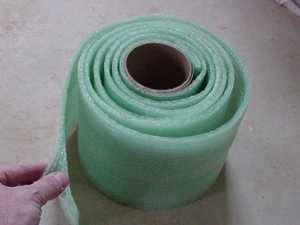
Also, don't forget to lay down a barrier underneath the sill to insulate and prevent moisture from wicking up from the concrete.
Step 2: - Using Bolts
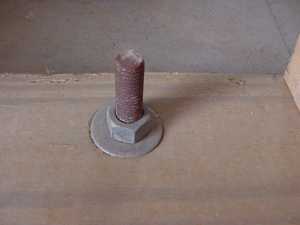
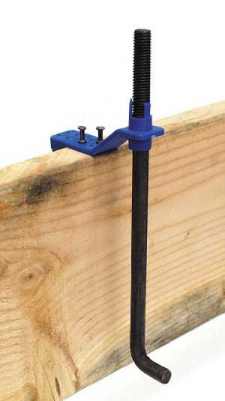
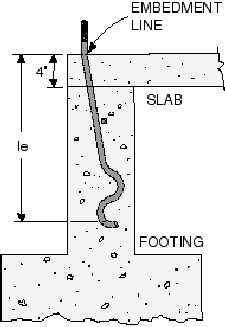
The first method is to use a bolt, placed in the concrete when it is poured. This is relatively easy and provides a very strong means to hold down your sill plate. There are a few challenges when working with bolts. The first is placement. Depending on your job, you might be able to simply embed the bolts after striking off the concrete, but before the concrete has set. For a large job, there are bolt holders which will keep the bolt in position, but concrete finishing requires that you work around the holder. The second challenge is keeping the threads clean of concrete. Wrap the threads in duct tape and this will save you from wire brushing later. While a simple J-bolt can be used, there are larger bolts that can be used to tie together the footing and slab.
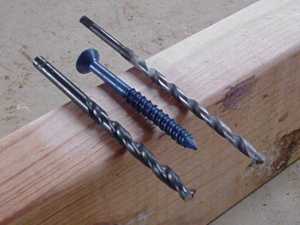
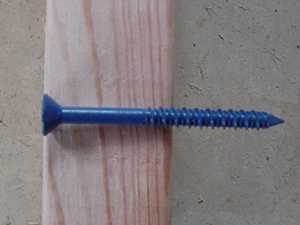
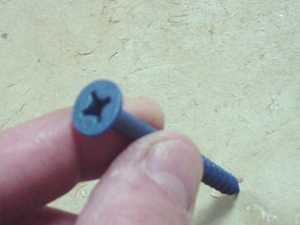
Step 3: - Anchor Screws
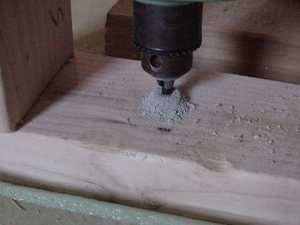
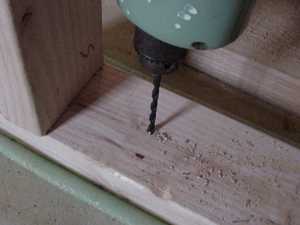
The anchor screw is a quick and easy way to help tie down your sill. You can install this after the framing is in place by drilling through the sill and concrete. The drill for the concrete has a special tip using carbide. You will want to also drill a larger pilot hole as the screw should not bind on the sill. The screws are somewhat expensive, but really seem to do the job. Tap-Con is one of the leading vendors and uses a conventional Phillips head.
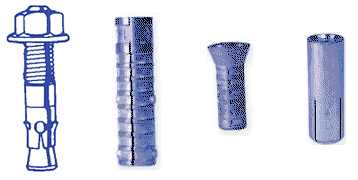
Step 4: Lag, Shield, and Drop-in Anchors
The drop-in anchors generally work by expanding or wedging the anchor once in the hole in the concrete. These typically require a larger diameter hole than the screws. You'll need a heavy carbide bit. It's more work than simple anchor screws, but substantially stronger.
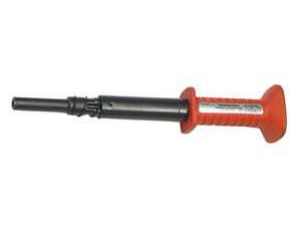
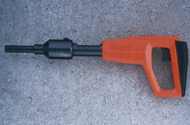
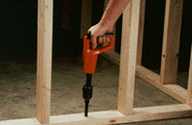
Step 5: Power Stud
If the concrete is set and framing complete, there's another option for fastening you sill plate. The PowerHammer or PowerDrive by Remington are used to shoot through the sill into the concrete. This is fast going and performed after the sill plate is installed. With the gun, you simply point and shoot.